Contents
- 1 How To Tie A Salmon Jig:
- 2 Overview of the process:
- 3 Securing the jig head in the vice:
- 4 Organizing materials for easy access:
- 5 Adding materials to the hook shank:
- 6 FAQs:
- 7 Q: How long does it take to tie a salmon jig?
- 8 Q: Can I reuse jig heads when tying salmon jigs?
- 9 Q: What type of thread should I use for tying salmon jigs?
- 10 Q: How do I know which materials to use for tying salmon jigs?
- 11 Q: Is it difficult to learn how to tie salmon jigs?
Tying a salmon jig is a fundamental skill for any angler pursuing these prized fish. Begin by selecting a quality jig head that matches the size and weight needed for your target salmon species and fishing conditions. Next, secure the jig head in a vice to hold it steady.
Choose a durable thread that matches the color of your jig head and start wrapping it tightly around the base, creating a solid foundation. Add desired materials such as feathers, fur, or synthetic fibers to the hook shank, building up layers for both visual appeal and effective movement underwater.
Finish by tying off the thread with a secure knot and adding a dab of adhesive to ensure durability. With practice and attention to detail, you’ll master the art of tying salmon jigs, enhancing your chances of a successful fishing expedition.
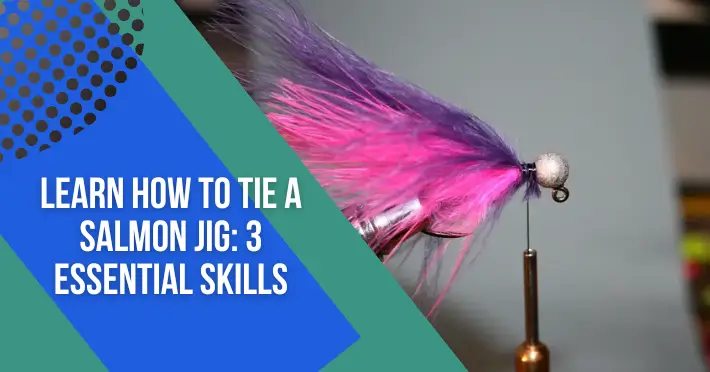
How To Tie A Salmon Jig:
Tying salmon jigs holds significant importance for anglers due to several reasons:
Customization: Tying your salmon jigs allows you to customize the design, size, and color to match the specific preferences and behaviors of the salmon species you’re targeting. This customization increases the chances of attracting fish and enticing them to strike.
Adaptability: Salmon fishing conditions can vary greatly, from shallow rivers to ocean waters. By knowing how to tie your jigs, you can adapt to these diverse environments by adjusting the weight, size, and materials used in your jigs to effectively fish in various conditions.
Cost-effectiveness: Purchasing pre-made salmon jigs can add up in cost over time, especially if you fish frequently or require a variety of jig styles. Tying your jigs allows you to save money in the long run by using readily available materials and reusing jig heads.
Skill Development: Tying salmon jigs is a valuable skill that enhances your overall fishing proficiency. It requires precision, creativity, and attention to detail, all of which contribute to becoming a more versatile and successful angler.
Personal Satisfaction: There’s a sense of pride and satisfaction that comes with catching salmon on jigs you’ve tied yourself. Knowing that your craftsmanship played a role in landing a prized fish adds an extra layer of enjoyment and fulfillment to the fishing experience.
Overall, the importance of tying salmon jigs lies in the ability to tailor your fishing approach, save money, develop essential angling skills, and derive personal satisfaction from your fishing endeavors.
Overview of the process:
The process of tying a salmon jig involves several key steps:
Material Selection: Begin by selecting a suitable jig head that matches the size and weight needed for your target salmon species and fishing conditions. Choose quality materials such as feathers, fur, or synthetic fibers for the jig’s body and tail.
Preparation: Secure the jig head firmly in a vice to hold it steady during the tying process. Organize your materials and tools for easy access.
Tying Process: Start by wrapping thread tightly around the base of the jig head, creating a solid foundation. Then, add materials to the hook shank, layering them to achieve the desired appearance and movement underwater. Use tight wraps to secure the materials in place.
Finishing Touches: Tie off the thread with a secure knot and trim any excess material. Apply adhesive to ensure durability and prevent the materials from unraveling during use.
Practice and Refinement: Mastery of tying salmon jigs requires practice and refinement. Experiment with different materials, colors, and designs to find what works best for your fishing style and target species. Seek feedback from experienced anglers and continue to refine your technique over time.
By following these steps, anglers can create customized salmon jigs tailored to their preferences and fishing conditions, ultimately enhancing their chances of success on the water.
Securing the jig head in the vice:
Securing the jig head in the vice is a crucial step in the process of tying a salmon jig. Follow these steps to ensure a secure hold:
- Open the Vice: Begin by loosening the vice jaws and opening them wide enough to accommodate the jig head without damaging it.
- Position the Jig Head: Place the jig head securely between the jaws of the vice, ensuring that it sits firmly and evenly. Position it in a way that allows easy access to the hook shank for tying.
- Tighten the Vice: Once the jig head is positioned correctly, tighten the vice jaws gradually to secure it in place. Apply enough pressure to hold the jig head firmly without crushing or damaging it.
- Check Alignment: Verify that the jig head is aligned straight and level within the vice jaws. This ensures that your jig will be tied evenly and accurately.
- Double-Check Stability: Give the jig head a gentle tug to ensure it’s securely held in place by the vice. If necessary, make any adjustments to tighten the vice jaws further for added stability.
By securely securing the jig head in the vice, you create a stable foundation for tying the rest of the jig, allowing for precise and efficient workmanship.
Organizing materials for easy access:
Organizing materials for easy access is essential to maintain a smooth and efficient tying process. Follow these steps to ensure your materials are readily available:
- Workspace Setup: Begin by clearing and organizing your workspace to provide ample room for working comfortably. Ensure you have adequate lighting and ventilation.
- Gather Materials: Collect all the materials you’ll need for tying the salmon jig, including jig heads, threads, feathers, fur, synthetic fibers, scissors, and adhesive. Place them within arm’s reach on your workspace.
- Organize by Type: Group similar materials together to make them easier to locate during the tying process. For example, keep feathers in one container, fur in another, and threads in a separate area.
- Arrange by Size and Color: If you’re using materials of different sizes or colors, arrange them in an order that facilitates quick selection. Consider using small containers or trays to keep them organized and separated.
- Label Containers: If you have multiple containers or compartments for your materials, label them accordingly to quickly identify what’s inside. This saves time and minimizes confusion during tying.
- Keep Tools Handy: Place your scissors, vice, and any other tools you’ll need within easy reach in your workspace. This ensures you can grab them quickly when needed without interrupting the tying process.
- Maintain Cleanliness: As you work, keep your workspace tidy by putting away materials you’ve finished using and discarding any waste or excess material. This prevents clutter and helps you stay focused on the task at hand.
By organizing your materials for easy access, you streamline the tying process and minimize interruptions, allowing you to focus on creating high-quality salmon jigs efficiently.
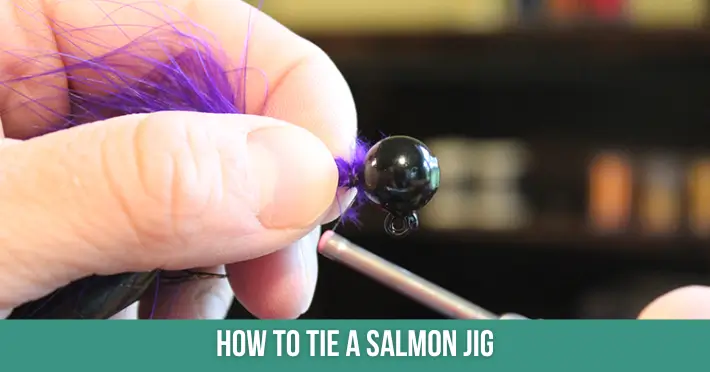
Adding materials to the hook shank:
Adding materials to the hook shank is a critical step in creating a salmon jig. Here’s a guide to effectively add materials:
- Prepare the Hook: Ensure that the hook shank is clean and free from any debris or excess thread. This provides a smooth surface for adding materials and ensures a secure hold.
- Select Materials: Choose the materials you want to use for the body and tail of the jig, such as feathers, fur, or synthetic fibers. Consider the size, color, and texture of the materials to match the appearance and behavior of the target salmon species.
- Secure the Thread: Start by wrapping the thread tightly around the hook shank, beginning at the base of the jig head. Create a solid foundation by making several wraps of thread and securing it with a knot.
- Attach Materials: Take the first material you’ve selected, whether it’s a feather or fur, and position it along the hook shank where you want it to start. Hold the material firmly in place with one hand while using the other hand to make tight wraps of thread around it.
- Build Layers: Continue adding materials to the hook shank, layering them one on top of the other to build up the body of the jig. Use a combination of materials to achieve the desired appearance and movement underwater.
- Secure with Thread: After each material is added, secure it in place by making tight wraps of thread around the hook shank. This ensures that the materials won’t come loose during use.
- Trim Excess: Once all the materials are added and secured, trim any excess material and thread with scissors to tidy up the jig’s appearance.
- Apply Adhesive: Finally, apply a small amount of adhesive to the wraps of thread to secure them further and prevent unraveling.
By following these steps, you can effectively add materials to the hook shank to create a well-constructed and visually appealing salmon jig.
Conclusion:
In conclusion, the art of tying salmon jigs offers anglers a range of benefits. From customization to cost-effectiveness and skill development, the ability to create personalized jigs tailored to specific fishing conditions enhances the overall fishing experience.
By practicing and refining tying techniques, anglers can improve their success rates and derive greater satisfaction from their fishing endeavors. Whether it’s on the riverbank or out at sea, the proficiency gained through tying salmon jigs is sure to make each fishing trip more rewarding and enjoyable.
FAQs:
Q: How long does it take to tie a salmon jig?
A: The time required to tie a salmon jig can vary depending on factors such as the complexity of the design, the skill level of the angler, and the materials being used. On average, it may take anywhere from a few minutes to half an hour to tie a single jig.
Q: Can I reuse jig heads when tying salmon jigs?
A: Yes, jig heads can often be reused multiple times when tying salmon jigs. As long as the jig head remains in good condition and securely attached to the hook, it can be used for multiple tying sessions, saving anglers money in the long run.
Q: What type of thread should I use for tying salmon jigs?
A: Anglers typically use strong, durable threads such as nylon or polyester for tying salmon jigs. These threads offer good strength and stability, ensuring that the materials are securely attached to the hook shank during use.
Q: How do I know which materials to use for tying salmon jigs?
A: The choice of materials for tying salmon jigs depends on factors such as the target salmon species, fishing conditions, and personal preferences. Common materials include feathers, fur, synthetic fibers, and flash materials. Experimenting with different combinations can help determine which materials are most effective in attracting salmon.
Q: Is it difficult to learn how to tie salmon jigs?
A: While tying salmon jigs requires practice and patience to master, it is a skill that can be learned by anglers of all experience levels. Starting with simple patterns and gradually progressing to more complex designs can help build confidence and proficiency over time.
Additionally, there are many online tutorials and resources available to assist anglers in learning the art of tying salmon jigs.